
I agree. Let's start with step 1.
Supplies you'll need:
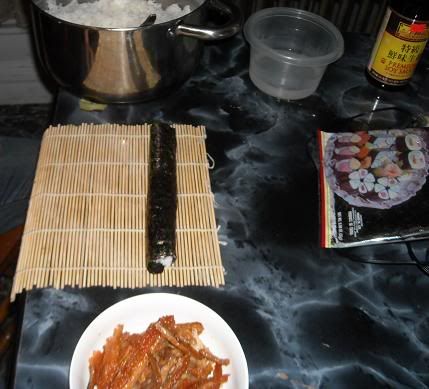
Nori or Seaweed Paper.
This is a very delicate sheet made of seaweed that you wrap the sushi with. Usually, 10 of them come in a package. They can either be roasted or flavored with herbs. I need to stress that this stuff is ultra delicate so when working with it, be very careful.
A bamboo sushi rolling mat.

You can get this plus the nori paper in any Asian supermarket or specialty store. It's not expensive at all. A package of nori paper goes for a bit under $2 and the rolling mat you'll find for around the same, and the mat is reusable. If you really can't find it, I guess you can use wax paper or your bare hands, but you won't get it as tight as it needs to be.
Sushi Rice.

This is an Asian style, short grain, glutinous sweet rice. What you're looking for when you cook it is that the rice should stick together enough that mouthfuls can easily be picked up with chopsticks, but not be at all sticky or gummy. Each grain should be white and smooth, almost pearl-like, and should taste subtly not just of starch but of delicious grain.

You can either boil it, pressure cook it or put it in a rice steamer like Ghostshouter did for our sushi party. If you can't find sushi rice, any short to medium grain rice will do. Brown rice doesn't stick together as well, but I have seen it used in sushi before. This by far will be the most expensive part of your sushi; a medium bag of sushi rice can cost upwards of $6-8, depending on where you go.
Rice vinegar

Rice Vinegar is a mild vinegar made from fermented rice or rice wine. It's dirt cheap, I get a huge bottle for a dollar and change. This stuff does wonders for a stew or stir fry as well. Ghostshouter uses a special spiced vinegar to flavor his rice but I don't like the way it tastes. Your best bet is to just go with a plain rice vinegar, it's cheaper.
To make the sushi rice taste perfect, follow this simple recipe:
2 Cups cooked rice
3-4 Tbspns Rice Vinegar
2-3 Tbspns Table Sugar
2 tspns Table Salt
Once it's all mixed together, you're ready for Step 2:
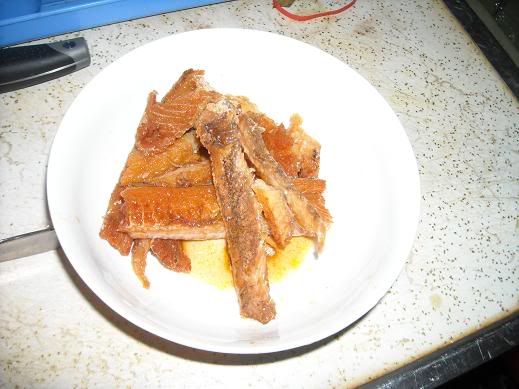
Choose a fish. Nobody says you have to have fresh salmon, tuna steak or roe when you first start out, that's way too expensive and you're going to screw up the first few times so it would be a waste. They sell a can of roasted eel in sauce for $2 in the same places I usually get my nori paper, and it's mouth-wateringly delicious. This is what it looks like.
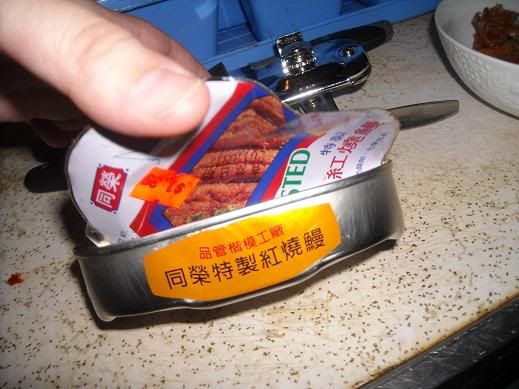
They're a bitch and a half to open, and some of them contain black beans, so be careful.
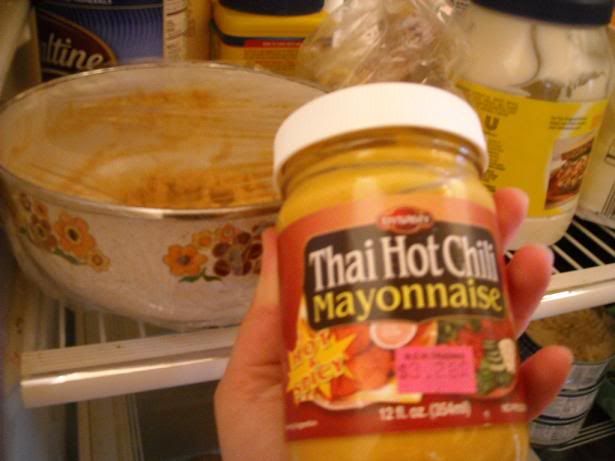
Yes, you can use tuna fish. Yes, you can use marinated salmon from a pouch, or salted anchovies from a jar. Yes, there can be herbs and spices, and even lemon zest if you want. And no, there doesn't have to be fish in it at all; stuff it with a mixture of avocado, cucumber, scallion and salad greens if you want, it will still be an awesome sushi roll. Remember that sushi is supposed to be edible art, so use your imagination. Make sure there's a variety of colors, textures and flavors in there to make it as appealing visually as it is to your taste buds. If you insist on using fresh fish, unless you're right there when the fish is killed and cut up, I would gear more towards a frozen tuna steak. If the fish market *smells* fishy, you should turn around and walk right out. Fish collects bacteria uber fast and it can be deadly so I would suggest you use canned or preserved fish instead. You should also remember that the roll itself doesn't have to be overly flavorful if you have the right condiments.
And yup, you guessed it, condiments are step 3:

Oh yeah, you can buy wasabi by the tube too. What is wasabi? It's ultra-hot Japanese mustard that when dabbed ever-so-lightly on a roll and dunked in soy sauce, your sushi will be fit for the gods. I don't remember exactly how much this is, but it's not that expensive, and if you like wasabi, it will be more than worth the money. Wasabi powder is cheaper but it's not hot in unto itself, you must mix it with water and keep it in a glass jar for 10 minutes. There's something about the glass that brings out the heat, I dunno. I wouldn't keep it in there for more than 10 minutes or it'll be too hot to eat.
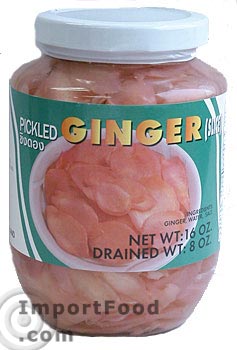
I'm not a big fan of pickled ginger so I've never gotten it, but it shouldn't be terrible expensive either. Ghostshouter took several days to pickle his own ginger. If anyone's interested, I'll get his recipe and post it here.
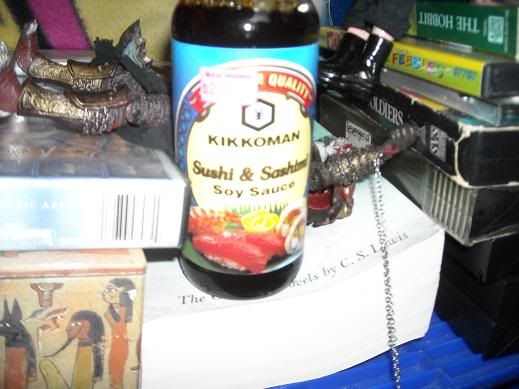
Proper Japanese soy sauce. No, not all soy sauces are created equal. Japanese soy sauce is fermented with rice wine and has a bolder taste. Regular Chinese soy sauce may be awesome with your stir fry, but it won't taste right with sushi. Kikkoman makes an intense soy sauce especially for sushi and sashimi. It's a bit pricey but worth it. Do you absolutely need it? I dunno, when was the last time you ate sushi at a restaurant without using soy sauce?
This brings us to the final stage in our hunting-gathering stage, the accompaniments. For simple rolls like what you saw in the first picture, you can totally skip this stage, and even the garnish stage. But if you're confident in your sushi-rolling ability and want to kick it up a notch, these are some great sushi fillers.
Step 4: Guest Stars
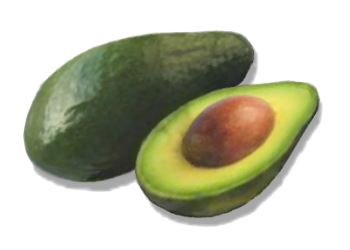
Avocados may be high fat, but they add that extra richness and smoothness to any roll, especially if it's a vegetarian roll. A roll with just eel and avocados are divine enough where you won't need anything else.
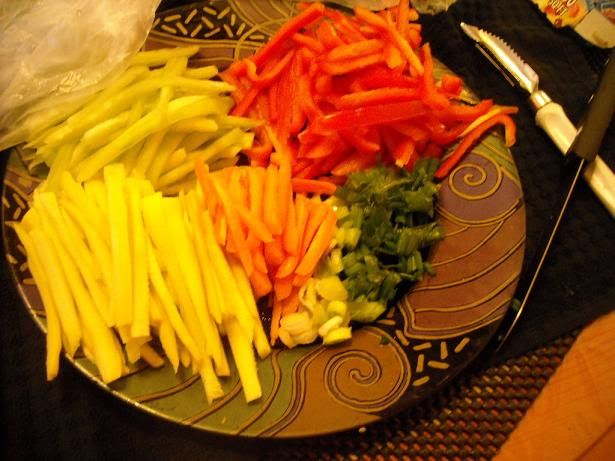
Fresh garden greens: Scallions, cucumbers, bell pepper, carrots and yellow squash. Make sure they're cut thin, a lot like this so that they fit right inside the roll. Things like lettuce and baby spinach make great fillers too, and they just look great inside the roll. You can get all fancy by adding pickled relish and stuff, but you wouldn't be reading this if you were quite at that advanced level. The main thing is to experiment with your additives. See what works, and which go the best together. This can be a real adventure!
_____
Okay, now that you've got all your supplies, you'll need one last thing. Get a small bowl and fill it with luke warm water. Trust me, you'll understand why in a bit.
Step 5 is putting the actual roll together, so are you ready? Let's go!
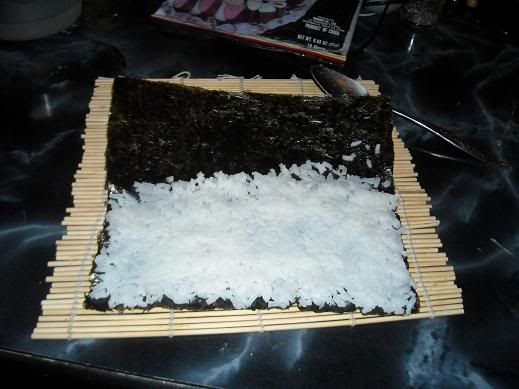
You want it to look like this. Put the rolling mat down and the nori sheet over it. They say to put it shiny-side down but I can never tell which side is supposed to be the shiny one, so I just say fuck it and use whichever side tickles my fancy. Spread your cooked, mixed and slightly cooled rice over half of it, making sure to get into the corners. This works best when using a spoon.
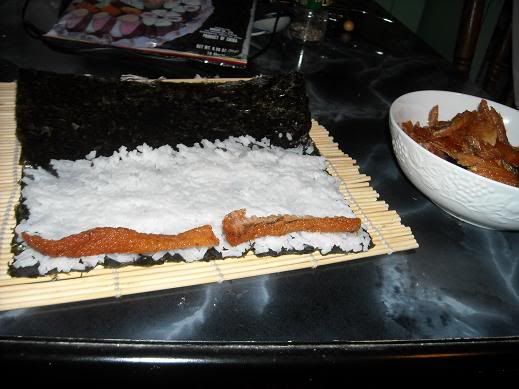
Now add the fish. This is a basic layout but you might want to add a bit more or risk the roll being skimpy.

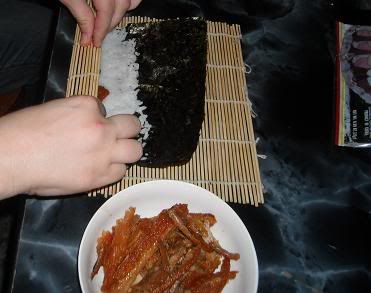
Use the rolling mat to wind up the seaweed paper all the way up to where the rice ends. Remember to roll it as tight as you can. Loose rolls fall apart when you cut, dunk and eat them.

Now, you only filled it up halfway with rice for good reason. Because this paper acts very much like an envelope.
You dip the tips of your fingers into the bowl with the water and dab it onto the edges and along the rim of the paper, and quite literally seal it closed. Use a bit more water on the outside to smooth it down if you have to.
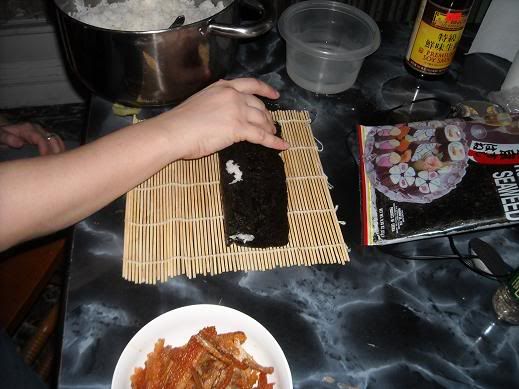
Your roll shout now look very much like this. Now put your roll aside seam-side down and let it rest for a bit before attempting to cut it.
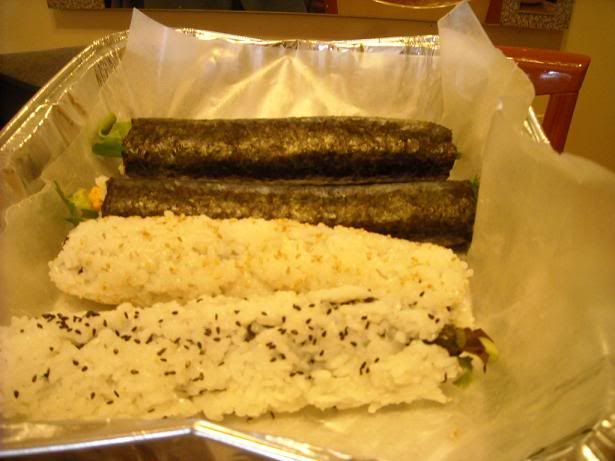
These are rolls I made for our sushi party. The inside-out ones are difficult, we'll save them for a later lesson.
Lesson 6:

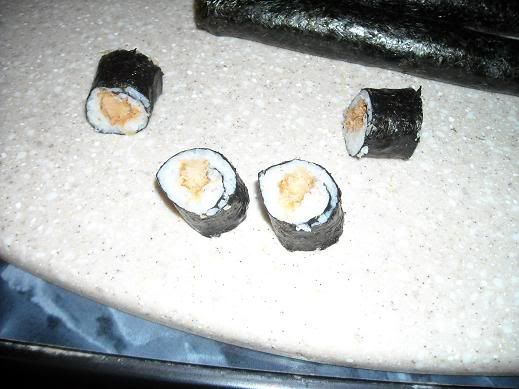
Before cutting, make sure the rolls have sat and rested for at least 5 minutes to allow the paper to dry somewhat. When ready to cut, use a very sharp serrated knife and very gently cut the roll into 6-7 even pieces. If it's not going through the roll easily, don't force it, get a better knife. When you have your pieces cut, arrange the ends flat-side down and the rest next to it in an appealing fashion. Like this!
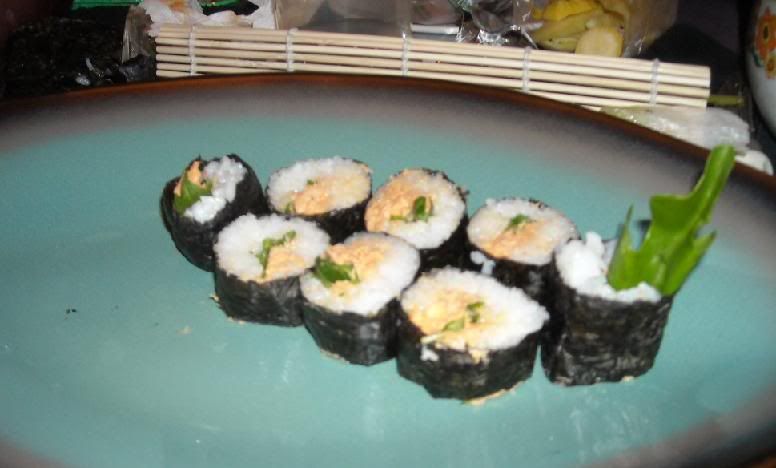
Also, don't be afraid to stack them on top of each other if you have to fit a lot on a small platter. If you rolled your sushi tight, they'll be strong enough to handle it. =)
Here's a few photos of the platters Ghostshouter and I have prepared, and the one Tammy and I made, so you can get ideas.


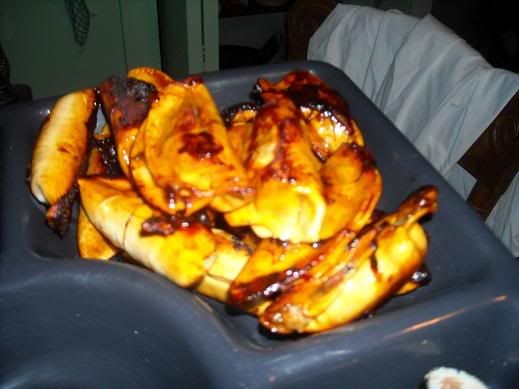
Tammy's marinated, fried dumplings were a part of that last one. Maybe I'll give you the recipe for that later, but I can assure you that the ones she boiled in miso soup were a thousand gajillion times better.

Yeah, I know you're all hungry now, bitches. So read over the lessons and try to make your own!! Believe me, if my dumb ass can do it, you can too.
No comments:
Post a Comment